Deep Reinforcement Learning for Atari Games using Dopamine

In this post, we will look into training a Deep Q-Network (DQN) agent (Mnih et al., 2015) for Atari 2600 games using the Google reinforcement learning library Dopamine. While many RL libraries exists, this library is specifically designed with four essential features in mind:
- Easy experimentation
- Flexible development
- Compact and reliable
- Reproducible
We believe these principles makes Dopamine one of the best RL learning environment available today. Additionally, we even got the library to work on Windows - which we think is quite a feat!
In my view, visualization of any trained RL agent is an absolutely must in reinforcement learning! Therefore, we will (of course) include this for our trained agent at the very end!
We will go through all the pieces of code required, but you can also find all scripts needed in the following Github repo.
1. Brief introduction to Reinforcement Learning and Deep Q-Learning
The premise of deep reinforcement learning is to “derive efficient representations of the environment from high-dimensional sensory inputs, and use these to generalize past experience to new situations” (Mnih et al., 2015). As stated earlier, we will implement the DQN model by Deepmind, which only uses raw pixels and game score as input. The raw pixels are proccessed using convolutional neural networks similar to image classification. The primary difference lies in the objective function, which for the DQN agent is called the optimal action-value function

where r_t is the maximum sum of rewards at time t discounted by \gamma, obtained using a behavior policy \pi = P(a∣s) for each observation-action pair.
There are relatively many details to Deep Q-Learning, such as Experience Replay (Lin, 1993) and an iterative update rule, but we refer the reader to the original paper for an excellent walk-through of the mathmatical details.
One key benefit of DQN compared to previous approaches at the time (2015) was the ability to outperform previous methods for Atari 2600 games using the same set of hyperparameters and only pixel values and game score as input, which was clearly a tremendous achievement.
2. Installation
This guide does not include instructions for installing Tensorflow, but we do want to stress that you can use both the CPU and GPU version. We encountered some issues related to GPU vs. CPU in our setting, so I will include some tips and tricks at the end that might help you.
Nevertheless, assuming you are using Python 3.7.x, these are the libraries you need to install (which can all be installed via pip):
tensorflow-gpu=1.15   (or tensorflow==1.15  for CPU version)
cmake
dopamine-rl
atari-py
matplotlib
pygame
seaborn
pandas
3. Training our agent
Hyperparameter tuning for Deep Reinforcement Learning requires significant amount of compute resources and therefore considered out of scope for this guide. Luckily, the authors of Dopamine have provided the specific hyperparameters used in Bellemare et al. (2017), which can be found in the following file. We use the contents of this “config file” as a string that we parse using the gin configuration framework. It contains all relevant training, environment and hyperparameters needed, meaning we essentially only need to update which game we want to run (although the hyperparameters might not work out equally well for all games).
3.1 Imports
We start by importing the required libraries
import os
import gin.tf
from dopamine.discrete_domains import run_experiment
Next, we define the root path to save our experiments
DQN_PATH = '/tmp/path/to/save/experiments/dqn'
Then, we define the game we want to run (in this instance we run the game “Pong”)
GAME = 'Pong'
And finally, we define the DQN config string:
dqn_config = """
# Hyperparameters used for reporting DQN results in Bellemare et al. (2017).
import dopamine.discrete_domains.atari_lib
import dopamine.discrete_domains.run_experiment
import dopamine.agents.dqn.dqn_agent
import dopamine.replay_memory.circular_replay_buffer
import gin.tf.external_configurables

DQNAgent.gamma = 0.99
DQNAgent.update_horizon = 1
DQNAgent.min_replay_history = 50000  # agent steps
DQNAgent.update_period = 4
DQNAgent.target_update_period = 10000  # agent steps
DQNAgent.epsilon_train = 0.01
DQNAgent.epsilon_eval = 0.001
DQNAgent.epsilon_decay_period = 1000000  # agent steps
DQNAgent.tf_device = '/gpu:0'  # use '/cpu:*' for non-GPU version
DQNAgent.optimizer = @tf.train.RMSPropOptimizer()

tf.train.RMSPropOptimizer.learning_rate = 0.00025
tf.train.RMSPropOptimizer.decay = 0.95
tf.train.RMSPropOptimizer.momentum = 0.0
tf.train.RMSPropOptimizer.epsilon = 0.00001
tf.train.RMSPropOptimizer.centered = True

atari_lib.create_atari_environment.game_name = "{}"
# Deterministic ALE version used in the DQN Nature paper (Mnih et al., 2015).
atari_lib.create_atari_environment.sticky_actions = False
create_agent.agent_name = 'dqn'
Runner.num_iterations = 200 # 200
Runner.training_steps = 250000 #   250000  # agent steps
Runner.evaluation_steps = 125000 # 125000  # agent steps
Runner.max_steps_per_episode = 27000 # 27000  # agent steps

AtariPreprocessing.terminal_on_life_loss = True

WrappedReplayBuffer.replay_capacity = 1000000
WrappedReplayBuffer.batch_size = 32
""".format(GAME)
And that is basically it!
Now, we just write the code for actually training our agent when executing the script:
if __name__ == '__main__':
  gin.parse_config(dqn_config, skip_unknown=False)

  # train our runner
  dqn_runner = run_experiment.create_runner(DQN_PATH, schedule='continuous_train')
  print('Will train DQN agent, please be patient, may be a while...')
  dqn_runner.run_experiment()
  print('Done training!')
Run the above (which will take a long time!) and you should see the DQN model crushing the Pong game!
4. Visualizing our agent
We ran the experiment for roughly 22 hours on a GTX 1070 GPU.
We include a visualization of the optimisation results and the “live” performance of our Pong agent.
We divide this into two sections, which are the a) visualization of the training optimisation results and b) live demonstration of its performance.
a) Tensorboard logs
Navigate to the tensorboard logs folder, which can be found inside the DQN_PATH that you defined earlier, and run the following:
tensorboard --logdir .
This should give you a visualization similar to this

You can see performance increases relatively slowly after 12 runs.
b) Live demonstration
Now for the fun part!
We will use the example_vis_lib from inside the utils folder of the Dopamine library.
Hence, our final script for running the live demonstration looks as follows:
from absl import app
from dopamine.utils import example_viz_lib

def main(_):
  example_viz_lib.run(agent='dqn',
                      game='Pong',
                      num_steps=100,
                      root_dir='C:/Users/Holm/Documents/dopamine',
                      restore_ckpt='C:/Users/Holm/Documents/dopamine/models/tf_ckpt-7',
                      use_legacy_checkpoint=False)

if __name__ == '__main__':
  app.run(main)
Run the above, and you should see the script starting to generate images for 1000 steps and then save the images into a video.mp4 file.
Here is a gif of our model:
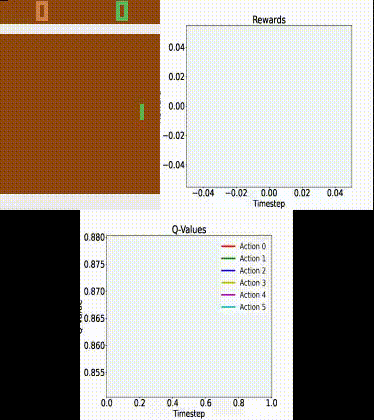
Clearly, the agent is not perfect and does lose quite a few games. Still, it does a relatively good job!
We could probably get a close-to-perfect agent if we trained it for a few more days (or use a bigger GPU).
5. Conclusion
And there you have it! That is basically how little code we actually need to implement a state-of-the-art DQN model for running Atari 2600 games with a live demonstration!
Feel free to experiment with the significantly better rainbow model (Hessel et al., 2018), which is also included in the Dopamine library, as well as other non-Atari games!
Hope you enjoyed this guide!
6. Tips and tricks (debugging)
You might run into the same issue I did, which was related to my tensorflow installation. Even though I installed the CPU version, the tensorflow libraries looks for my CUDA device when doing computations. If you already have the tensorflow GPU version installed and working then no worries - but for this post, I have decided to use the CPU version so everyone can follow along.
Nevertheless, add the following two lines to your script before doing any tensorflow computations!
import os
os.environ['CUDA_VISIBLE_DEVICES'] = '-1'
If you are having difficulties installing the pip version of tensorflow-gpu, you might also try the pre CUDA and cuDNN compiled conda version.
7. References
[1] Long-Ji Lin, Reinforcement learning for robots using neural networks (1993), No. CMU-CS-93-103.
[2] M. Hessel, et al., Rainbow: Combining improvements in deep reinforcement learning (2018), Thirty-Second AAAI Conference on Artificial Intelligence.
[3] P. S. Castro, S. Moitra, C. Gelada, S. Kumar, and M. G. Bellemare, Dopamine: A research framework for deep reinforcement learning (2018), arXiv preprint arXiv:1812.06110.
[4] V. Mnih, et al., (2015), Human-level control through deep reinforcement learning, Nature 518.7540 (529-533).